The first thing to check is your access level. The permissions assigned to your user will determine the extent of editing rights and the settings you can view -
- Normal User – Editing access for 'My Profile' only.
- Account Admin – Editing access for the settings against the accounts you are associated with via ‘Manage Account’
- Company Admin – Editing access for all account settings under the company, with the ability to create and re-assign branding to accounts via ‘Manage Company’.
You will need to be a 'Company Admin' to make these changes. If you encounter restrictions on the settings you wish to modify, please contact our support team via our live chat, or refer to their contact information here.
Configure Company Settings
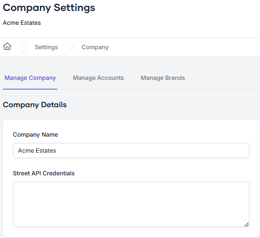
Personalise your reports by setting up your Company Settings. The more information you add to each account, the more details will be featured in the reports. To get started, go to ‘Settings’ > ‘Manage Company’.
The first tab allows you to view the format of your Company Name, amending it where necessary. If you use Street.co.uk CRM, you will be able to enter an Open API code from here, this will enable any leads captured from your QR codes to filter through to your Enquiry Centre on Street. To find out more on Street API Credentials, view our guide here.

The ‘Manage Accounts’ tab, will provide a list of all accounts under your company. Click the pencil icon next to each account and ensure the information is entered correctly. You might notice tool tips on the right hand side of the screen, these will advise you where this information will be used (for example, your opening hours will be displayed on any property report you generate).
The ‘Manage Brands’ tab allows you to view the existing brands under your company, reassign branding to individual accounts, or create a new brand. For detailed instructions on setting up a brand, refer to our guide here.
Manage Profile
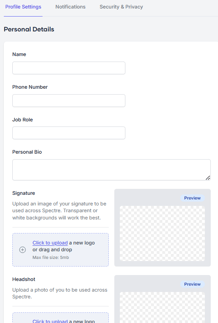
You’ll now need to set up your personal profile. This will pull through your personal details when you generate a property report. Navigate to ‘Settings’ > ‘Manage Profile’. From here you can enter your personal details and decide which notifications you wish to receive based upon engagement with your reports.

Manage Property Reports
Once you're satisfied with your company and personal settings, you can configure your report content by selecting ‘Manage Property Reports’ from the Settings menu.
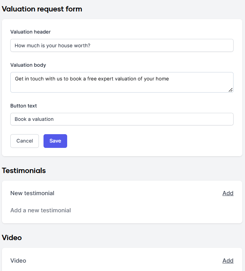
If you've completed the previous steps, the first four options under 'Report Content' (agent bio, agency bio, contact information, and opening hours) will be automatically populated. You'll need to configure your ‘Valuation Request Form,’ add any ‘Testimonials,’ and include a ‘Video’ if desired.

To tailor the appearance of your property reports, click on the ‘Report Design’ tab. From there, you can edit the following elements for the different styles of reports available:
Digital Report Style: Adjust the design of your digital reports for optimal viewing on both desktop and mobile devices.
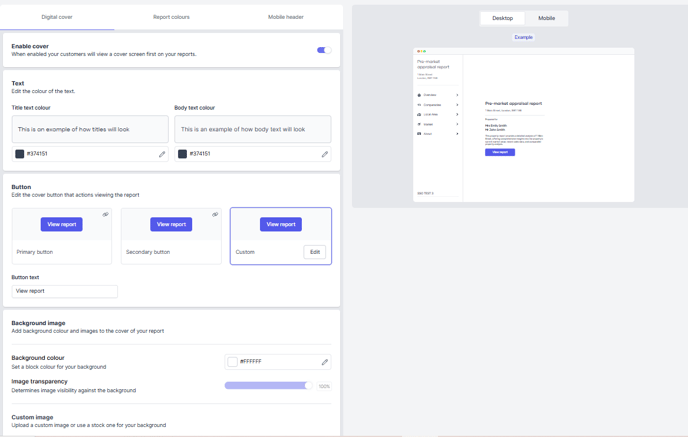
In this section, you can customise the branding for the Digital Cover, Report Colours, and Mobile Header to ensure a cohesive and visually appealing experience across your Digital Reports.
Digital Cover -
- Enable/disable Digital Cover
- Edit the colour of text and clickable buttons (use existing branding or apply a custom colour)
- Apply and edit your digital cover background image (upload your own or use a stocked image)

Report colours -
- Choose a brand or custom colour to be used throughout your digital reports (please note these changes will apply to the 'About Us' section).
-
Select a style for your report.
- Edit the colour of the menu text and icons in the navigation panel.
- Edit the colour of the text on branded sections.
- Select which logo is used on your digital reports for desktop.
Mobile header -
- Edit the background colour of any reports viewed by mobile.
- Select the style of the button for mobile.
- Select which logo is used on your digital reports for mobile.
Under each setting you will see a preview to the right hand side of your screen so that you can make edits accordingly to ensure that none of the colours clash. Please note, these settings will be used throughout your reports.
PDF Report Design- Apply pre-designed templates or customise PDF elements.
Under 'Orientation' you can -
- Apply a landscape or portrait PDF
From ‘Cover layout’ you can -
- Set a cover for your report
Under ‘Cover design’ you can -
- Apply a background design that will be used on the cover page only or delete the background for a blank report.
- You can choose a pre-built design from our suite or upload your own custom template (we recommend using ‘Canva’ or ‘Adobe illustrator template’ to create these).
- Edit the cover content (for example, choose to include/exclude your logo or the creation date of the report)
- Edit the cover title (set as address or name, apply font style)
- Control the images used on the cover (main image, title plot image, the data source logos)
From ‘Report design’ you can -
- Apply a background design that will be used on all pages (excluding the cover) or delete the background for a blank report.
- You can choose a pre-built design from our suite or upload your own custom template (we recommend using ‘Canva’ or ‘Adobe illustrator template’ to create these).
- Select the logo you want in the header of your report pages and amend the size.
- Edit the colour of the report content text (page titles, footer details and map pin colours)
Lead Capture Report - Configure your lead capture form settings.
- Configure the contact details requested from your Lead Capture page
- Decide which of those fields will be mandatory in order for a client to view a report. Please note, the email address is mandatory by default and cannot be changed.
Custom Domain - Add a custom domain to whitelabel your Property Report pages.
- To find out more on setting up your custom domain, visit our guide here.
Tracking and tags - Provide a tag to add custom functionality to your public facing content including reports and landing pages.
- To find out more on setting up your Google Tag Manager, visit our guide here.
Now your settings are ready to go, navigate to 'Property Reports' on the top menu to view the data, run reports & send!
.png?height=120&name=spectre-logo-white-transparent-bg%20(3).png)